Hot tubs have become a popular addition to homes and outdoor spaces, offering a perfect blend of relaxation, wellness, and entertainment. Whether placed on a backyard deck, patio, or indoor spa room, a hot tub provides a private retreat where family and friends can unwind. Understanding the benefits, features, and maintenance of hot tubs can help homeowners make the most of their investment while enjoying the ultimate relaxation experience.
The Benefits of Hot Tubs
Hot tubs offer a range of benefits that go beyond simple relaxation. One of the primary advantages is stress relief. Immersing in warm water helps relax muscles, ease tension, and promote a sense of calm. Hydrotherapy jets provide targeted massage, soothing sore muscles and joints, which is especially beneficial for individuals with arthritis or muscle stiffness.
In addition to physical relief, hot tubs offer mental wellness benefits. The combination of warm water, gentle jets, and a peaceful environment can reduce anxiety, improve mood, and enhance overall mental clarity. Regular use of a hot tub can contribute to better sleep patterns, as the warm water encourages relaxation before bedtime.
Hot tubs also provide a social benefit. They create a space for family gatherings, intimate conversations, or entertaining guests. The calming environment encourages connection, making hot tubs a valuable addition for both wellness and social interaction.
Types of Hot Tubs
When choosing a hot tub, there are several types to consider, each offering unique features:
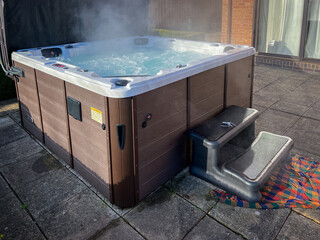
- Above-Ground Hot Tubs – These models are typically more affordable and easier to install. They come in various sizes, from two-person to large family-sized units, and offer portability for those who may relocate in the future.
- In-Ground Hot Tubs – Built into decks or outdoor spaces, in-ground hot tubs provide a seamless look and can be customized to fit the landscape. They offer a more permanent solution and often feature advanced hydrotherapy options.
- Portable Hot Tubs – Lightweight and easy to assemble, portable hot tubs are ideal for renters or those with limited space. They often include adjustable jets, temperature control, and insulation for year-round use.
- Swim Spas – These larger units combine the relaxation of a hot tub with the ability to swim against a current, offering both leisure and fitness benefits in one setup.
Features to Look for in a Hot Tub
Modern hot tubs come equipped with a variety of features designed to enhance comfort and convenience. Adjustable jets allow users to customize the intensity and location of hydrotherapy, targeting areas such as the back, shoulders, and neck. Ergonomic seating ensures comfort during extended soak sessions, while built-in lighting and sound systems add ambiance and entertainment options.
Temperature control is a key feature for hot tubs, allowing users to maintain the water at the desired warmth for optimal relaxation. Many hot tubs also include energy-efficient pumps and insulation to reduce energy costs while maintaining consistent water temperature. Additional features like automated cleaning systems, water filtration, and aromatherapy options provide enhanced convenience and wellness benefits.
Hot Tub Maintenance
Proper maintenance is essential to ensure that a hot tub remains safe, clean, and enjoyable. Regular water testing and balancing are crucial to prevent bacterial growth and maintain optimal water chemistry. Chemicals such as chlorine or bromine are commonly used to sanitize water, while pH levels should be monitored to prevent skin irritation or damage to the hot tub components.
Cleaning the filter regularly helps maintain water clarity and prolongs the lifespan of the hot tub’s circulation system. Draining and refilling the tub periodically, typically every three to four months, ensures fresh, clean water. Covering the hot tub when not in use protects it from debris, reduces heat loss, and improves energy efficiency.
Health and Safety Considerations
While hot tubs offer numerous health benefits, it is important to use them safely. Individuals with certain medical conditions, such as heart disease or pregnancy, should consult with a healthcare professional before using a hot tub. Maintaining water temperatures below 104°F (40°C) is recommended to avoid overheating or dehydration.
Hot tubs should also be used responsibly to prevent slips and falls. Non-slip surfaces, handrails, and adequate lighting around the hot tub area enhance safety. For households with children or pets, secure covers and supervision are essential to prevent accidents.
Choosing the Right Location
Selecting the right location for a hot tub enhances both convenience and aesthetics. Outdoor placements, such as decks, patios, or gardens, provide a relaxing view and an immersive experience in nature. Indoor installations offer privacy and year-round use, with the added benefit of integrating the hot tub into a home spa or wellness area.
Considerations for location include accessibility, privacy, level ground, and proximity to electrical and water connections. Proper placement ensures comfort, safety, and ease of maintenance.
Hot tubs are more than just a luxury—they are a lifestyle investment that promotes relaxation, wellness, and social interaction. With the right selection, features, and maintenance, a hot tub can provide years of enjoyment for individuals and families alike.
From stress relief and improved sleep to hydrotherapy and entertainment, the benefits of hot tubs are extensive. Choosing the right type, understanding key features, and following proper maintenance routines ensures that your hot tub remains a safe and inviting retreat.
Whether placed indoors or outdoors, a hot tub transforms any space into a sanctuary of comfort and rejuvenation. Investing in a high-quality hot tub enhances your home, supports physical and mental well-being, and creates a space where relaxation and connection thrive.